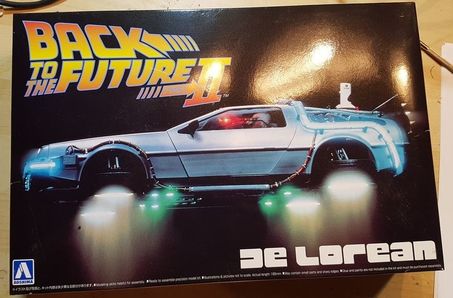
A Flying DeLorean - The Plan
|
|
One of the many cool things about Back to the Future is the time machine made out of a DeLorean. Even cooler is the fact that Doc went to the future and hard it converted to fly. A few people have built flying models/drones of the Delorean, all from scratch and all with funky dimensions. My plan is to make one based on the a scale model kit car, using of the shelf drone parts and some 3d printed parts, and keeping it under 250 grams so it falls with the FFA rules.
Parts that I'm going to use
|
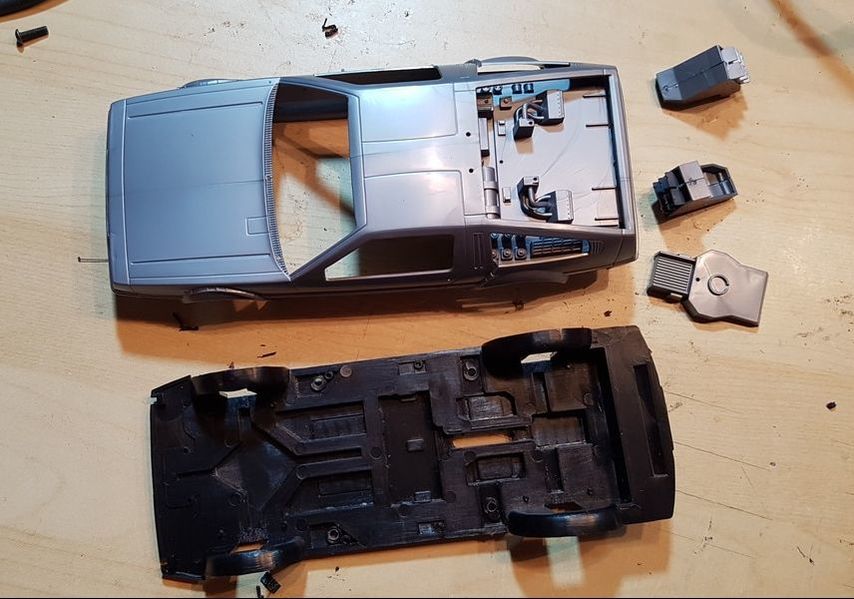
After going through the kit parts I pulled out all the parts that I wouldn't be using. The kit is too small to use use the seats as I'm going to need the space to place the lipo, flight controller, esc's and uBec. I'll use the same trick they used in the movie for the flying shots and tint the windows smokey gray.
|
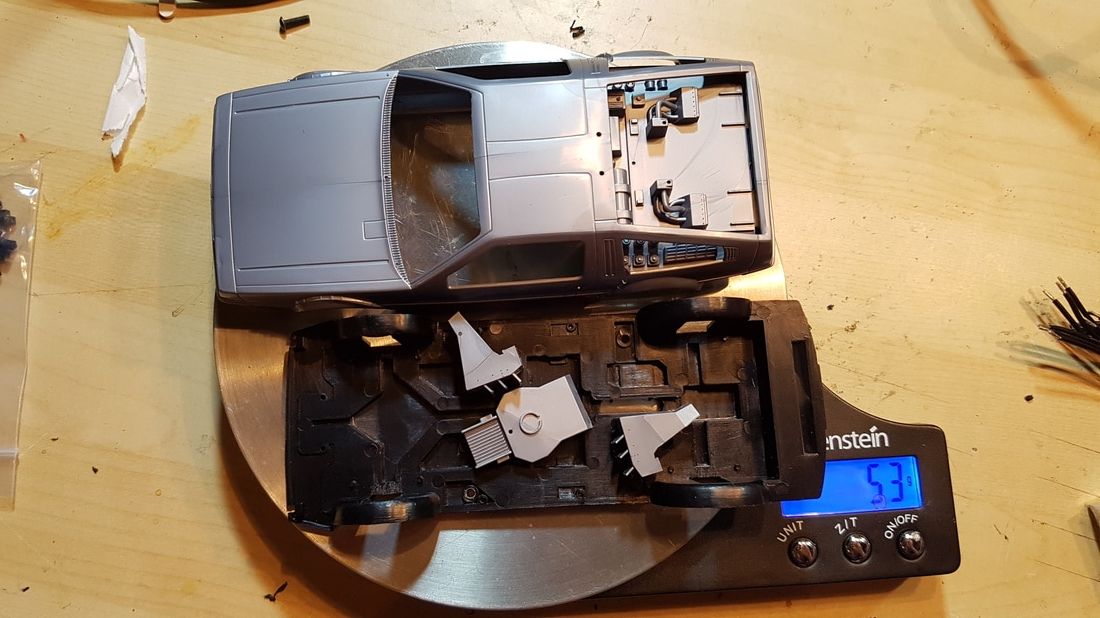
I'm also thinking about using a small FPV camera it there's any spare weight. As you can see the weight so far is 53 grams, there are a few more bits to be stuck onto the body, and I also need to make the fold out wheels that will act as the motor mounts.
|
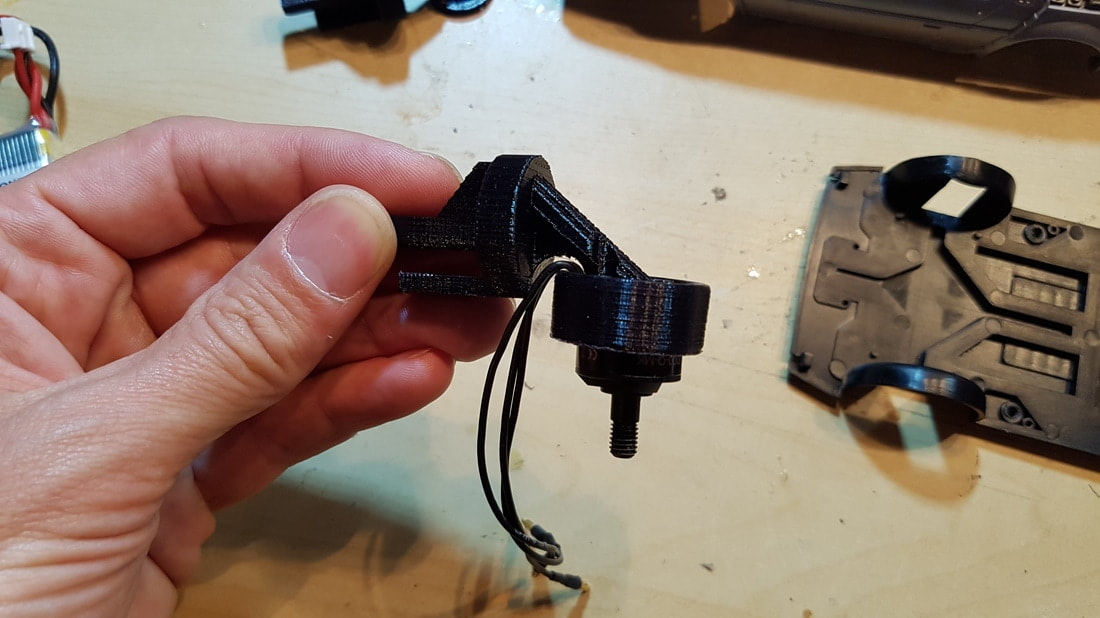
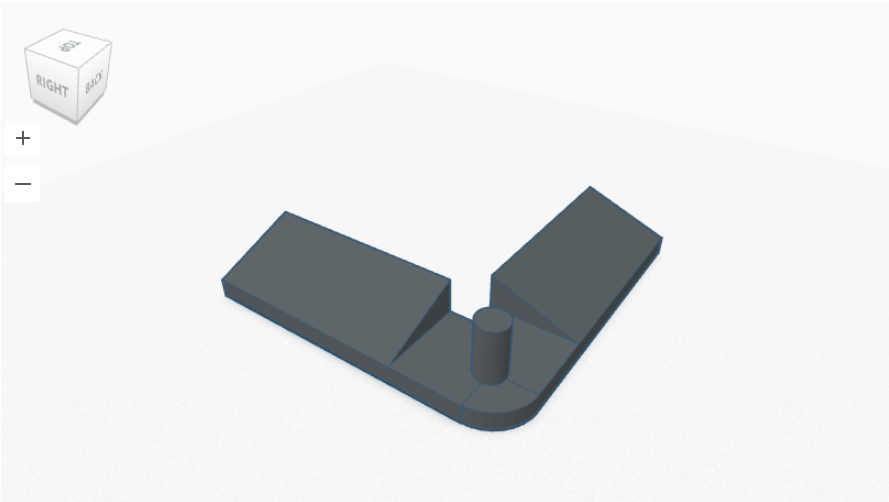
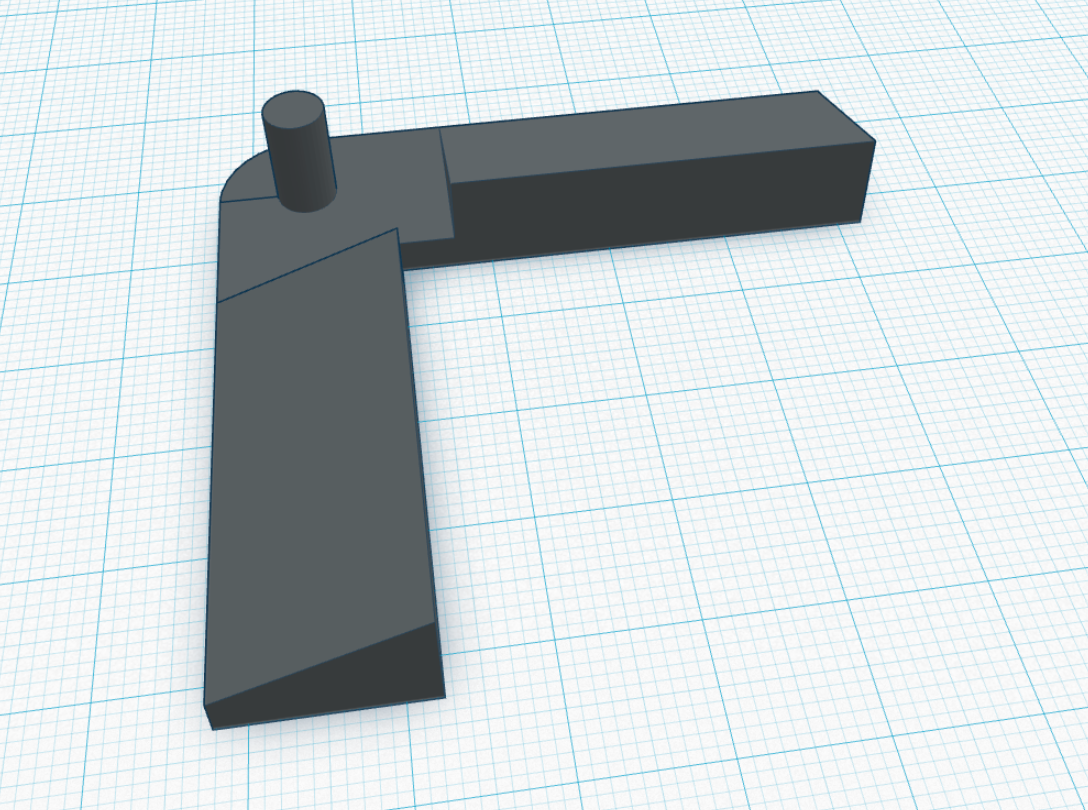
Designing the "Wheel" Motor Mounts
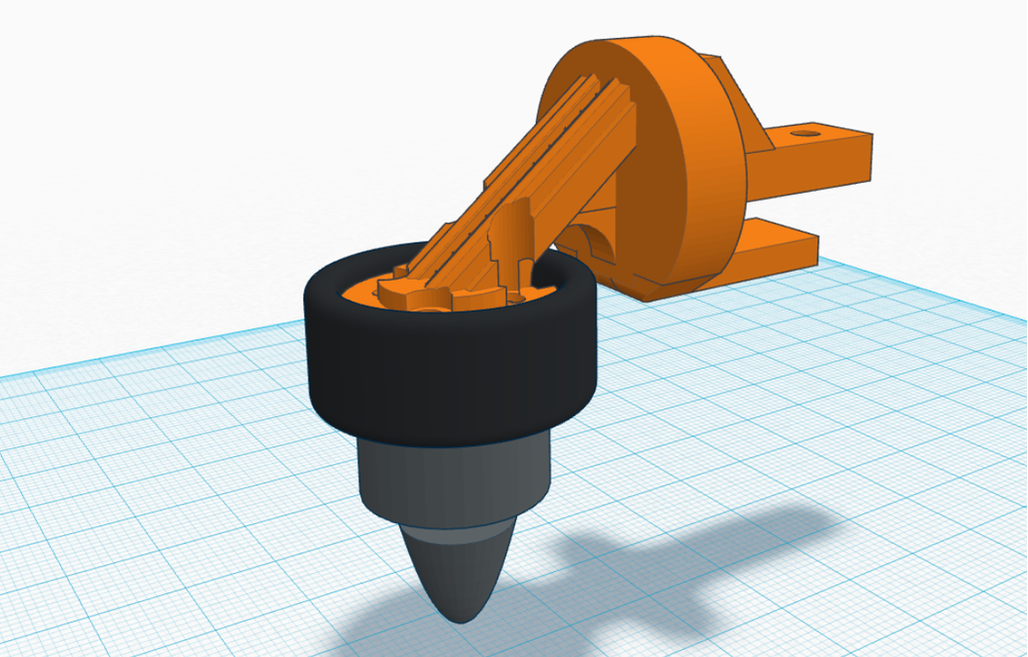
I spent this evening modeling the wheel motors mounts in Tinkercad. Yes I know there are better tools, but I like Tinkercad, it' s simplicity stops me from getting distracted.
The motors are going to have to be mounted upside down due to the fact the body of the car is going to be in the way if they are mounted the right way up. I'm using 1306 - 3000 motors with 16A ESC's and I'm hiding as much of the motor as I can inside the tire. I was originally planning on using 4-inch props but the wheel motor mounts would have to be modeled in such a way that it would look out of scale. Instead, I'm going to cut 5-inch props down to 3 1/2 inch props.
The motors are going to have to be mounted upside down due to the fact the body of the car is going to be in the way if they are mounted the right way up. I'm using 1306 - 3000 motors with 16A ESC's and I'm hiding as much of the motor as I can inside the tire. I was originally planning on using 4-inch props but the wheel motor mounts would have to be modeled in such a way that it would look out of scale. Instead, I'm going to cut 5-inch props down to 3 1/2 inch props.
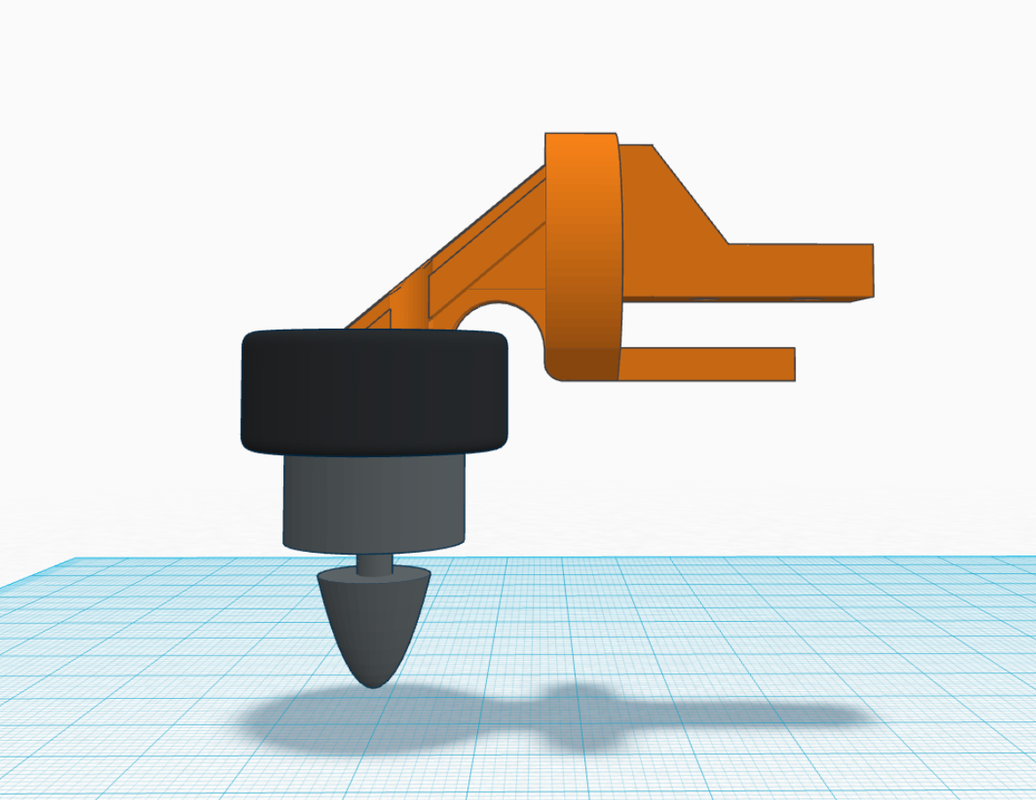

Once printed the wheel motors mounts should just push straight onto the frame and a few bolts will keep them in place.
Printing THE "WHEEL" MOTOR MOUNTS
Lots of printing to be done, then testing and assembling the wheel motor mounts.
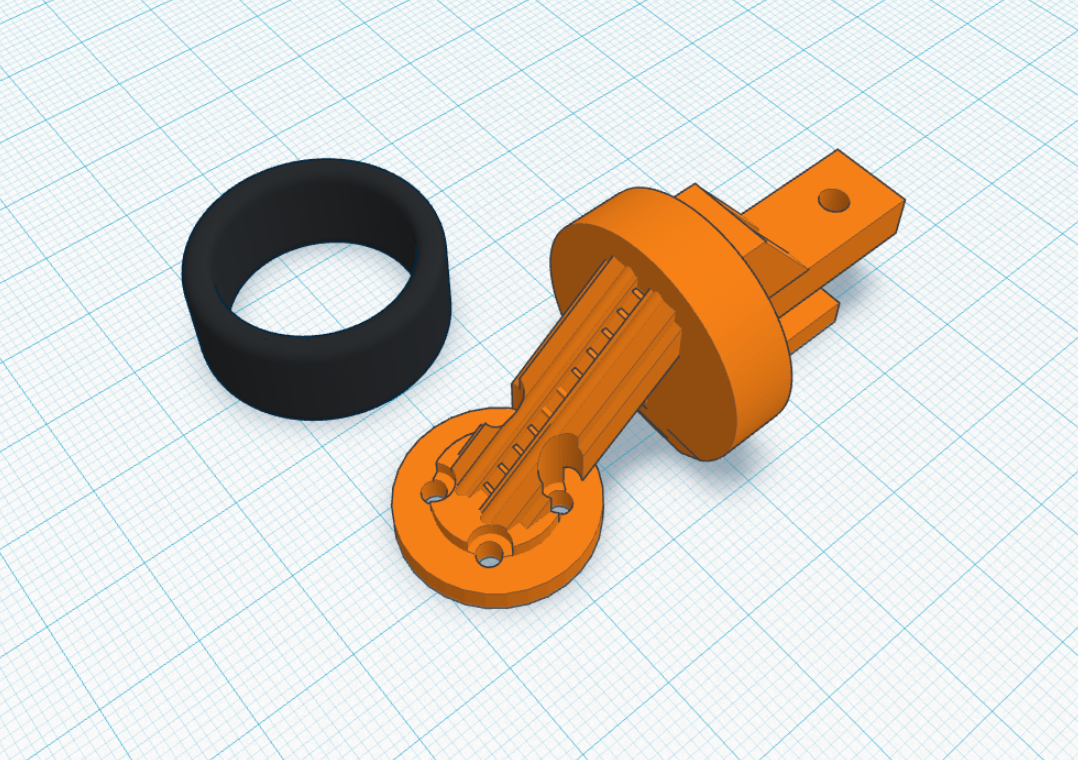
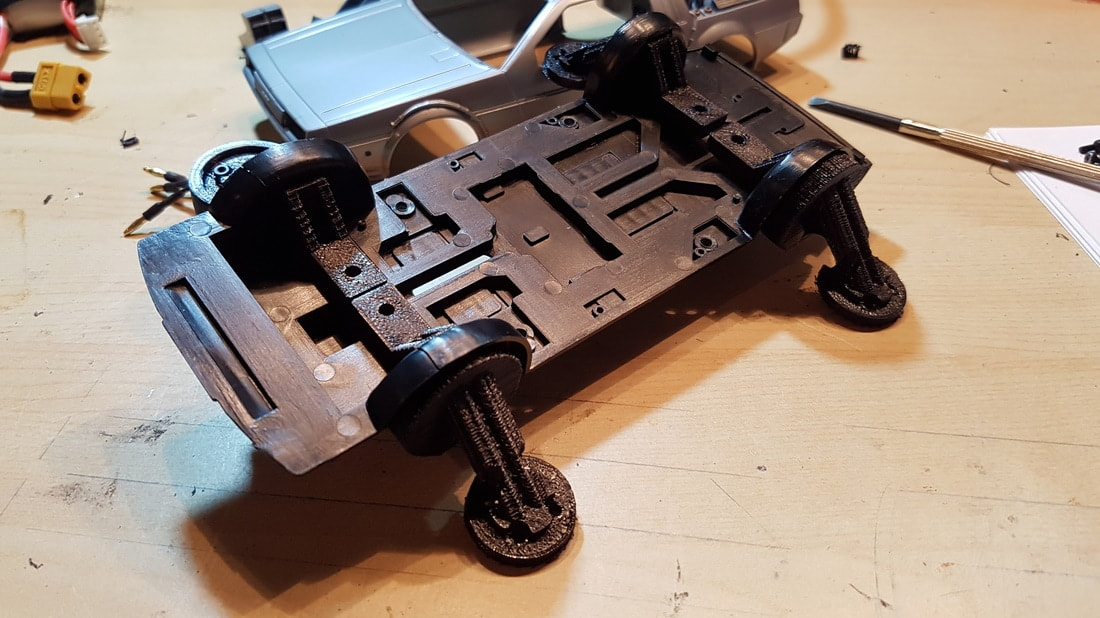
ASSEMBLING THE "WHEEL" MOTOR MOUNTS
Each print took about 90 minutes to print, the motor holes lined up and they slid into place as planned. The bolts to hold the wheel motor mounts in place fit but aren't pretty, they will do for now but I'm going to look for a replacement. Next up I need to design a way of holding the flight controller and lipo battery in place.

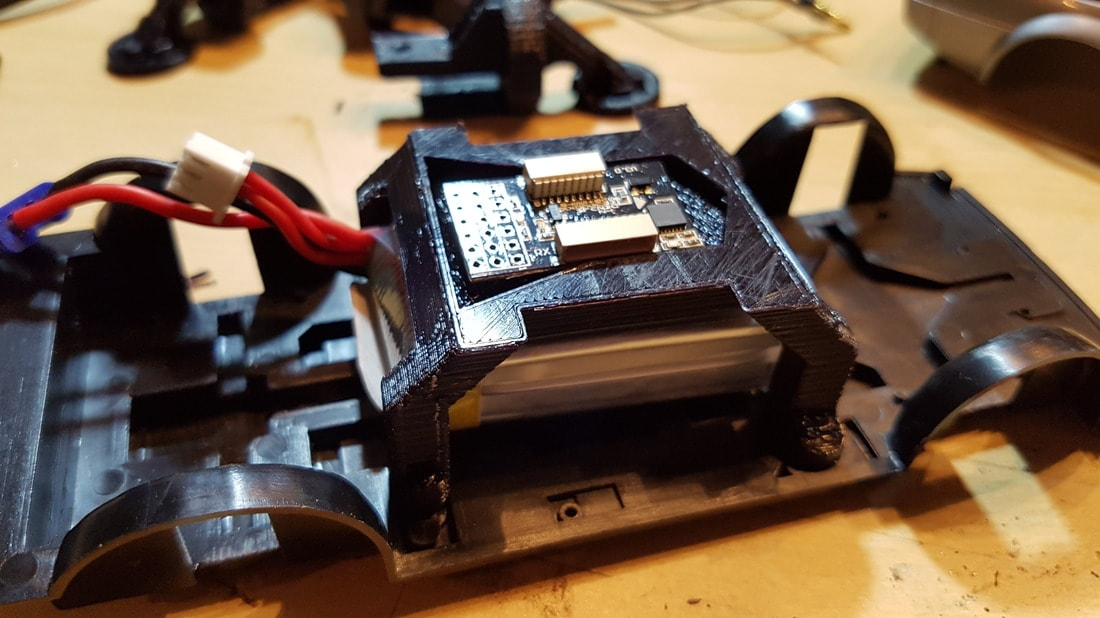
Flight Controller Mount
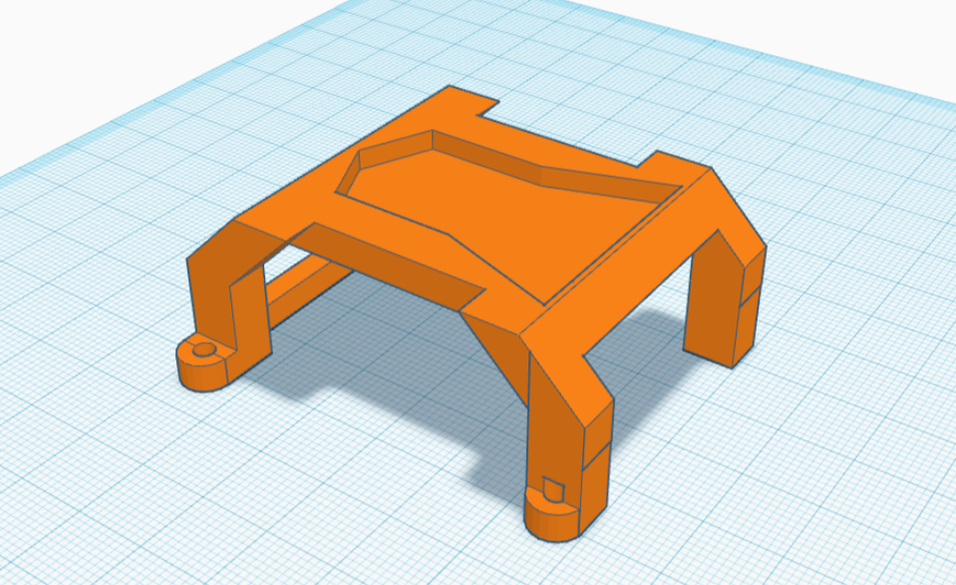
I would like to be able to place the lipo battery in the center of the Delorean along with the flight controller. On the bottom part of the kit there are 4 conveniently placed holes so I thought I may as use them. The idea is this 3D printed frame will not only hold the flight controller over the lipo, but also stop the lipo from sliding around.
I finally got out in a nice open space to fly the Delorean, unfortunately we had a video camera malfunction so there isn't any lengthy footage worth showing. I do however have these really nice pictures taken by a friend.
First a quick flight with the "top off" to get the feel of it.
First a quick flight with the "top off" to get the feel of it.
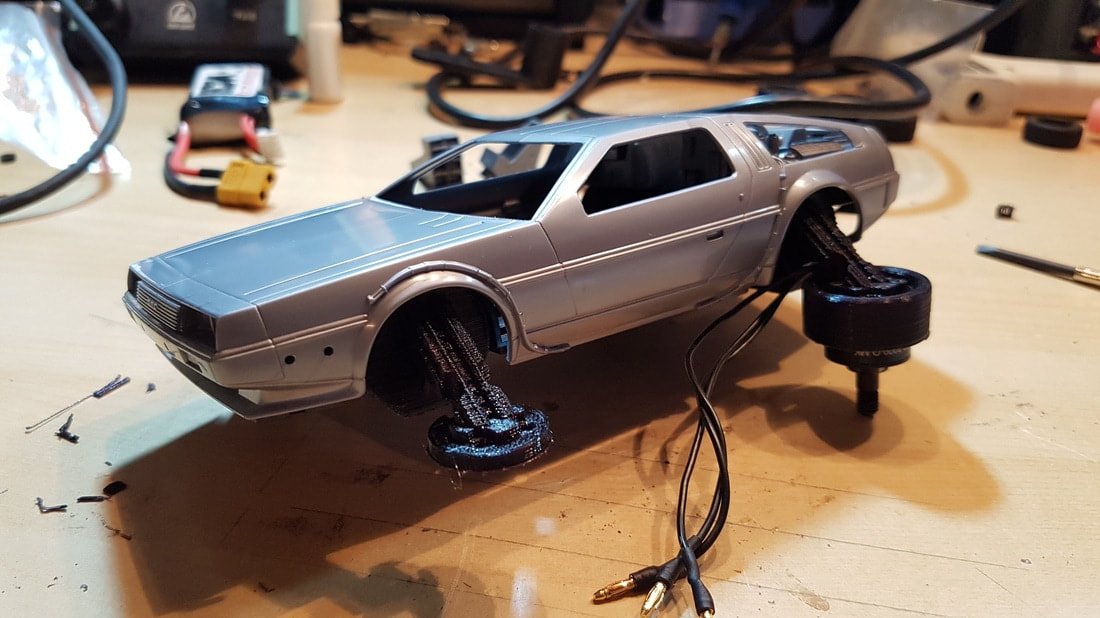
Test Assembly and wiring
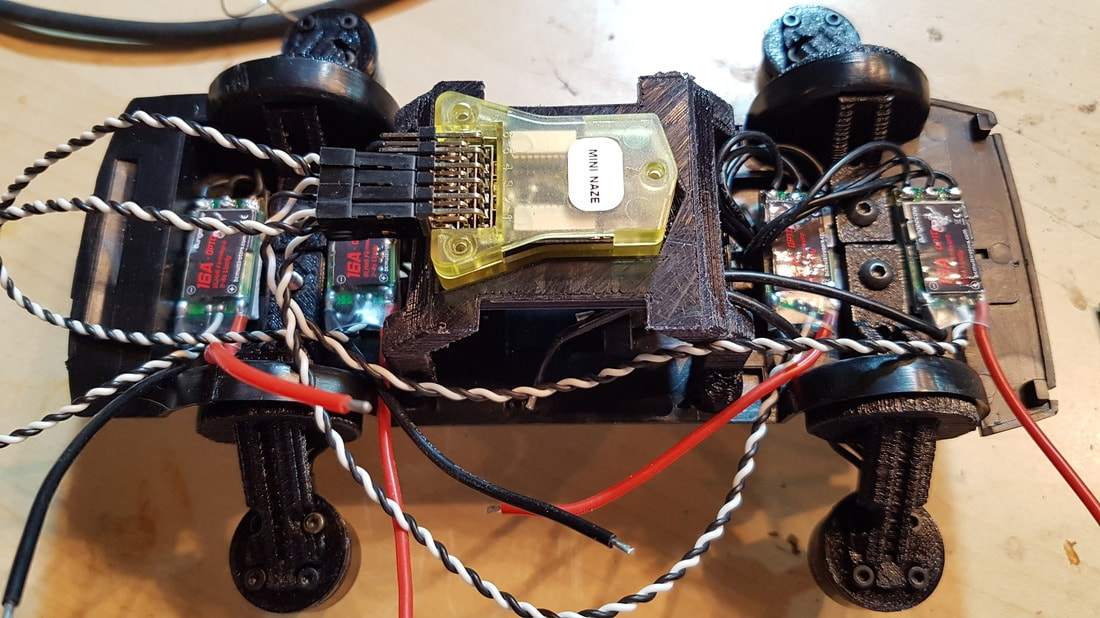
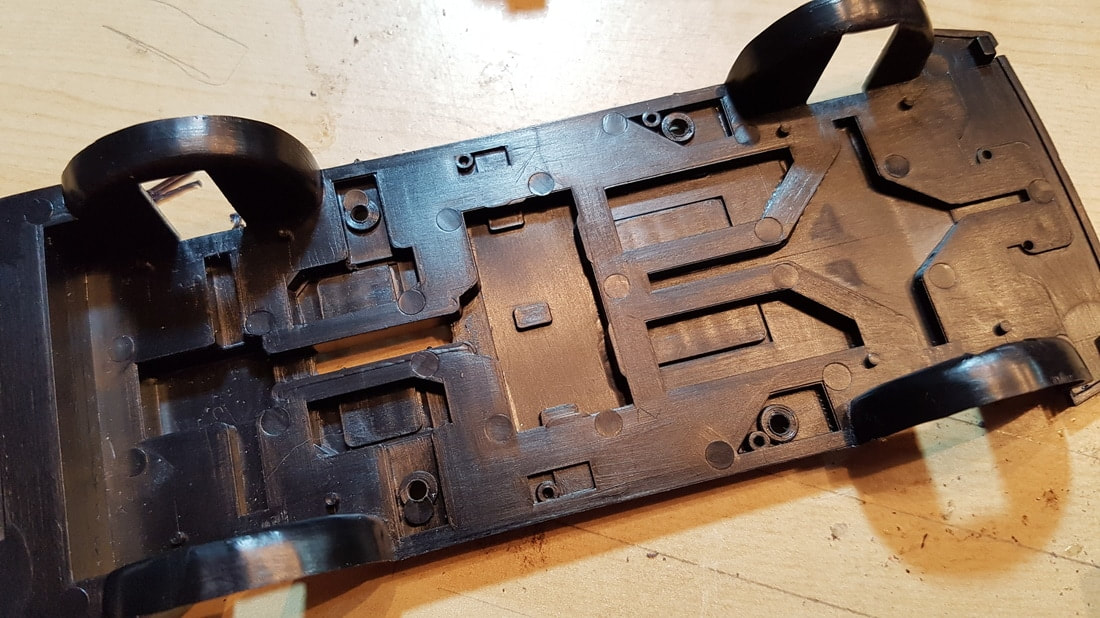
Assembly of the printed parts to the base of the model. The flight controller support fits nicely but I may change the design a bit and lose the groove that I've put in there, that way a standard flight controller can be used as well.
The back side of the car has a long hole in it for mounting to a display stand, this is perfect for running the motor wires through, I copied this towards the front for the front wires. Also a test placement of the ESC's in the frame shows there is plenty of room, I'll also need to squeeze the receiver in there.
The back side of the car has a long hole in it for mounting to a display stand, this is perfect for running the motor wires through, I copied this towards the front for the front wires. Also a test placement of the ESC's in the frame shows there is plenty of room, I'll also need to squeeze the receiver in there.
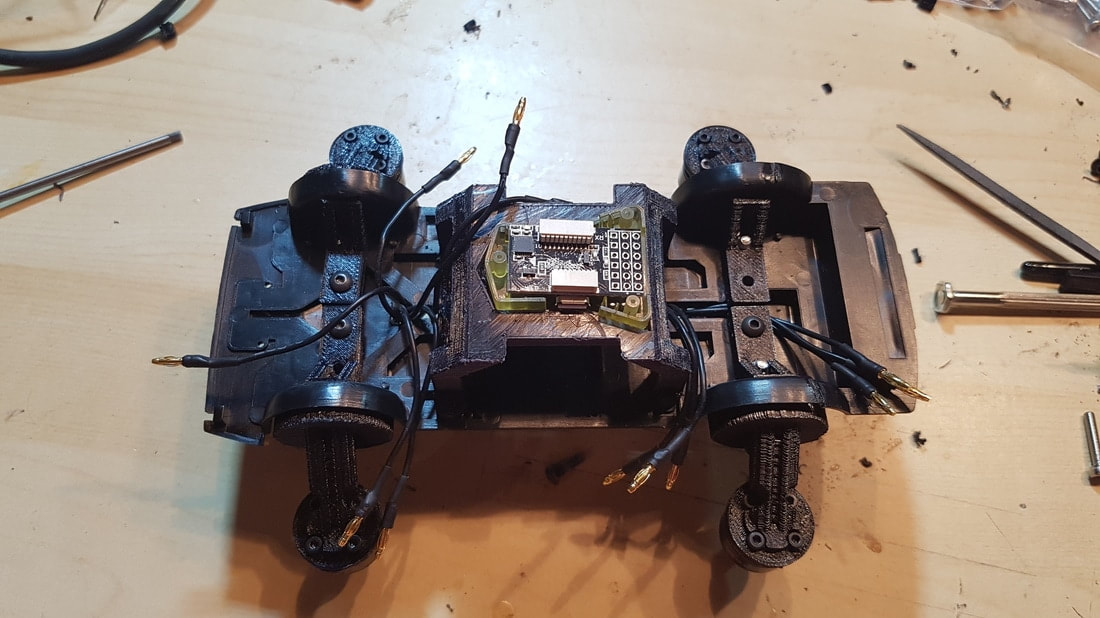
Soldering and Final fitting
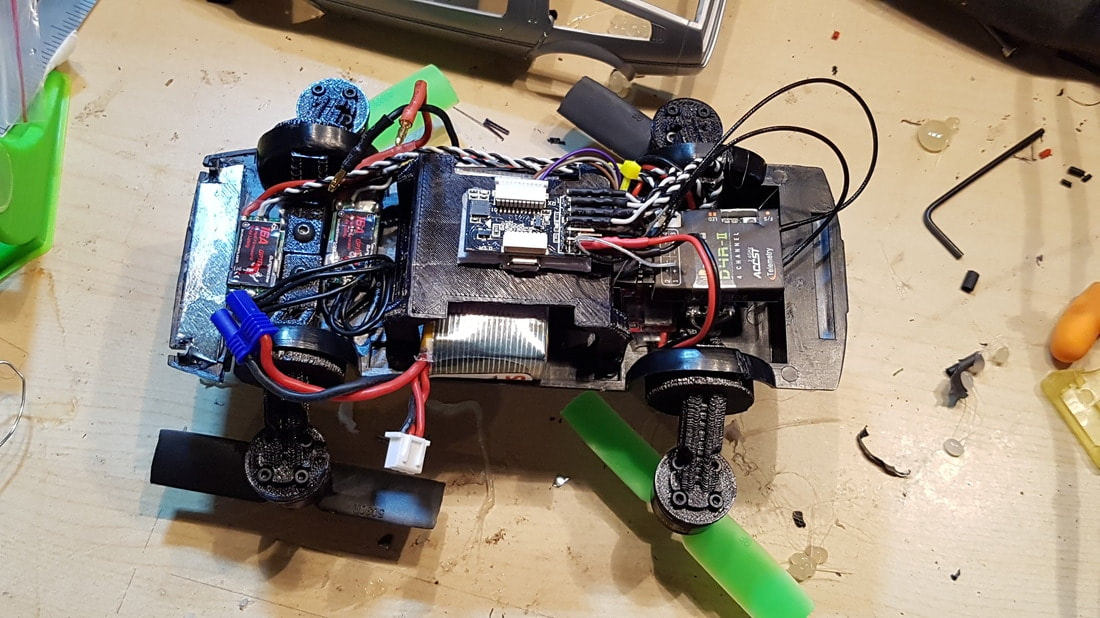


Final soldering of wiring, lots of trimming of wires as every gram counts. I finished the wiring and setup the flight controller and binding of the Taranis controller.
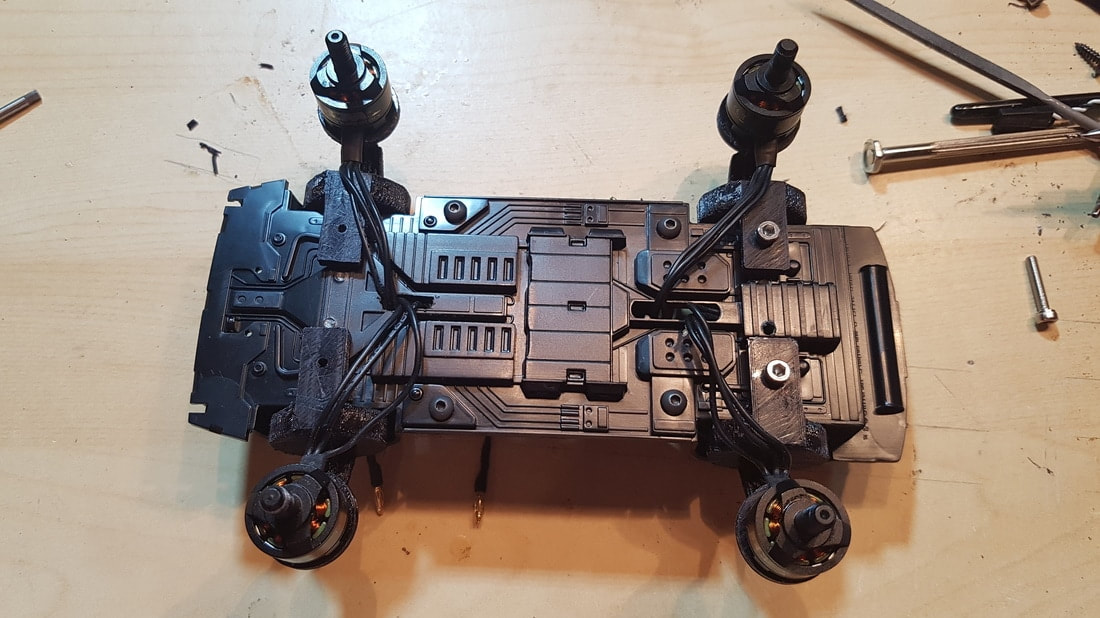
Hover Test
I'm using Cleanflight and even though the rates have not been tuned in any way I thought I would have a nice and not safe test flight in my very messy workshop.
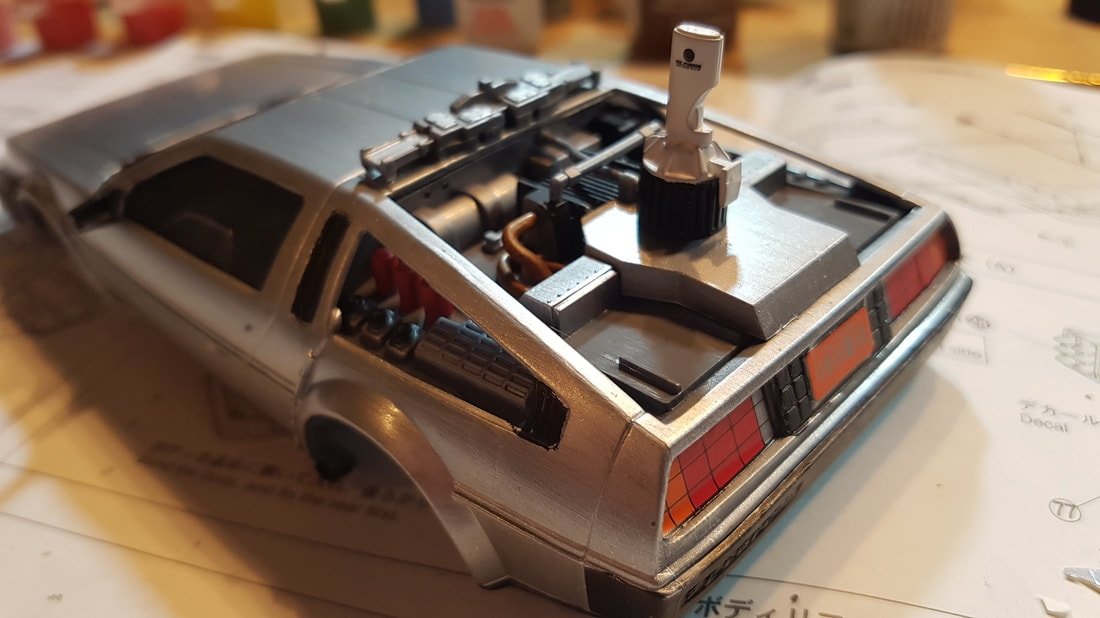
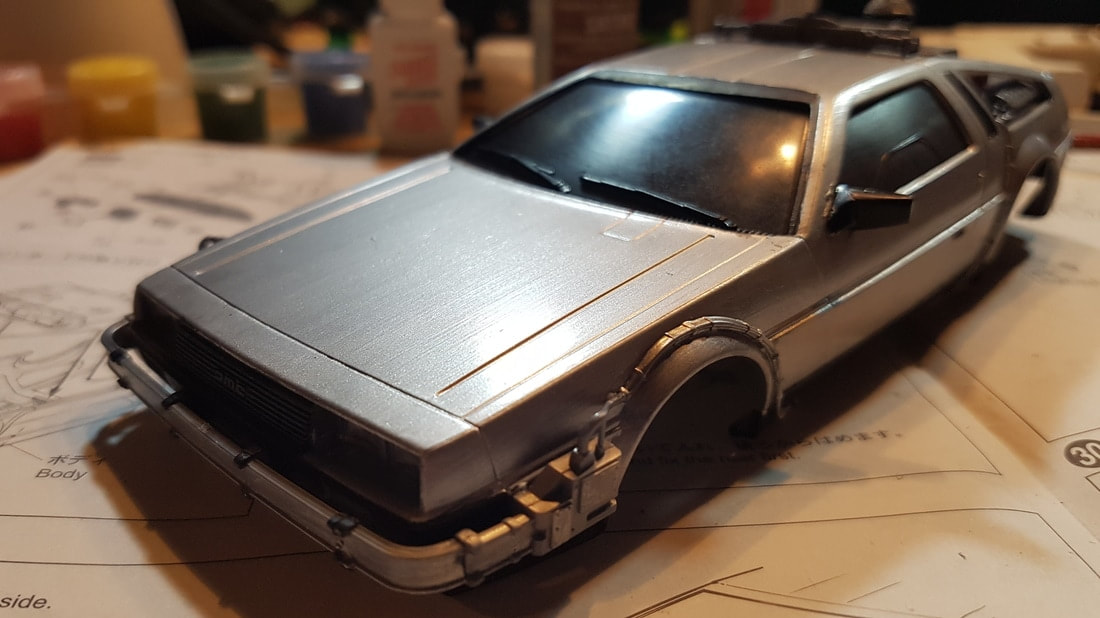
Painting
|
|
|
To get the brushed steel look the DeLorean is famous for I thought I would have a go at painting it with a .....brush. My paint of choice is Crafter's Acrylic Paint called Silver Morning.
Here is a video of the first coat, I think it's going to work and will need 2 or 3 coats.
The windows are going to be tinted so we don't see the inside, and it's not cheating because they did that on the film for some of the flying shots.
Here is a video of the first coat, I think it's going to work and will need 2 or 3 coats.
The windows are going to be tinted so we don't see the inside, and it's not cheating because they did that on the film for some of the flying shots.
|
|
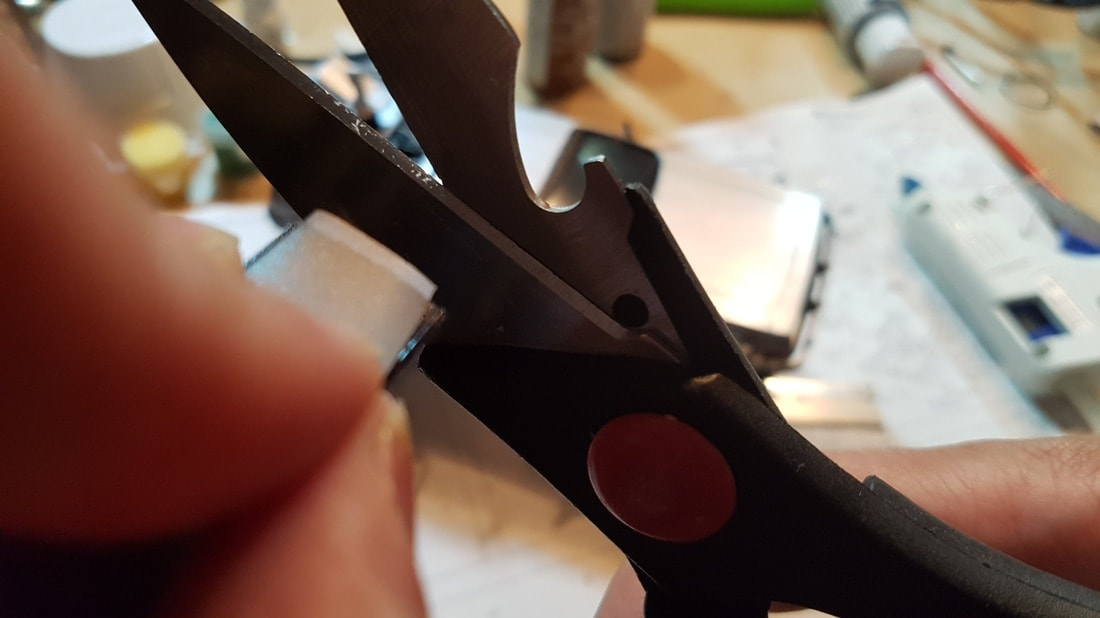
Prop Chopper and Clear Props
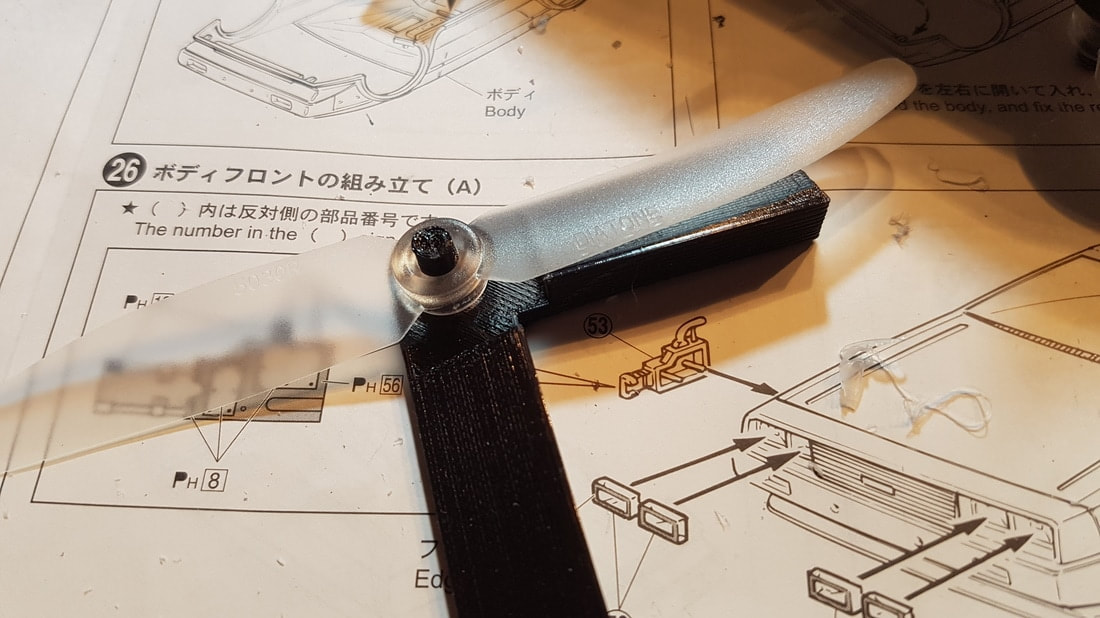
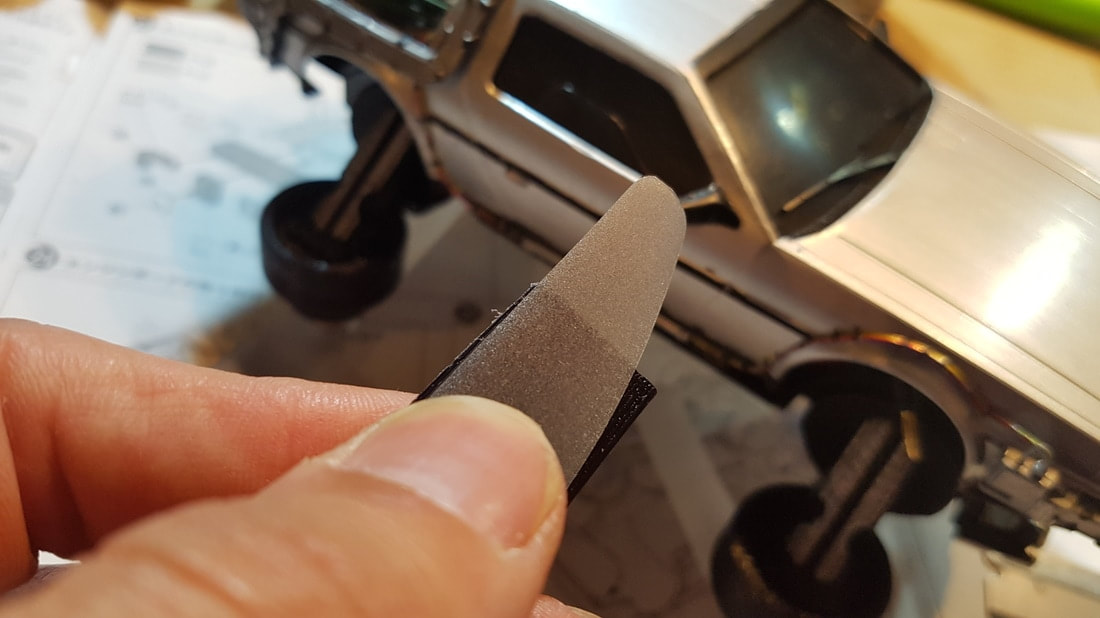
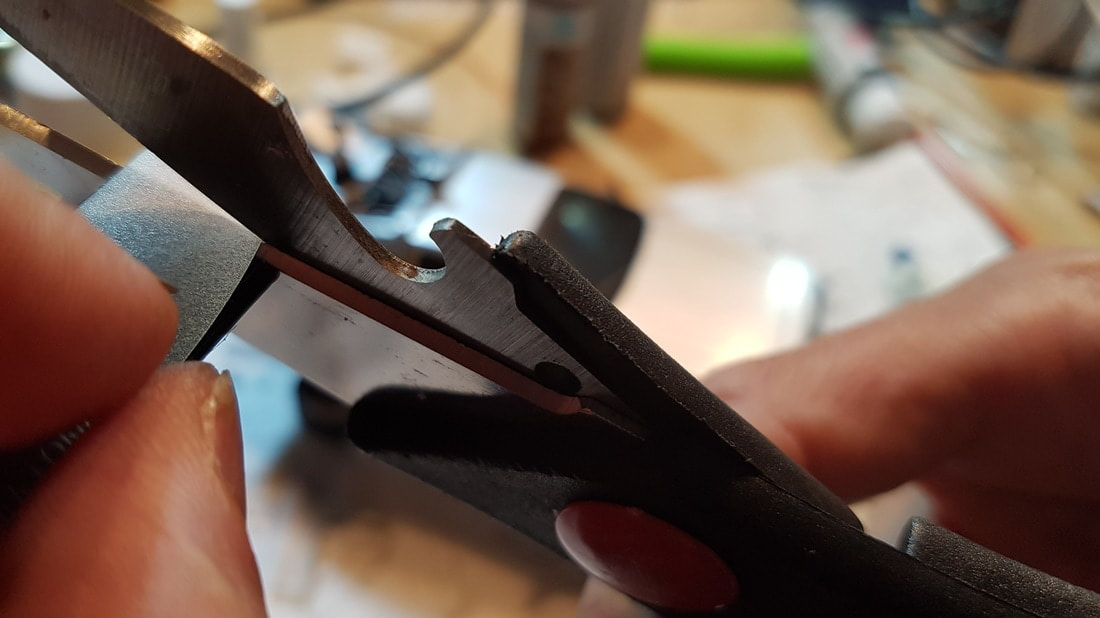
I'm using clear props even they cost more then black props and will need cutting down to fit but I think it will be worth it to help with the, "Not seeing them". At first, I used the Prop Chopper I made a while ago but the 4 inch cut down was a little too small, I want to squeeze as much out of these as possible. Also, the old Prop Chopper requires a Dremel style craft drill which isn't always handy when in a field.
The new Prop Chopper is a guide that holds the prop in place and supports the prop while you cut it with a pair of scissors.
The new Prop Chopper is a guide that holds the prop in place and supports the prop while you cut it with a pair of scissors.
FLIGHT Test number 2
Test flight footage to tweak some settings before I put the the finished body on. Better to get it right than destroying it on its maiden flight.
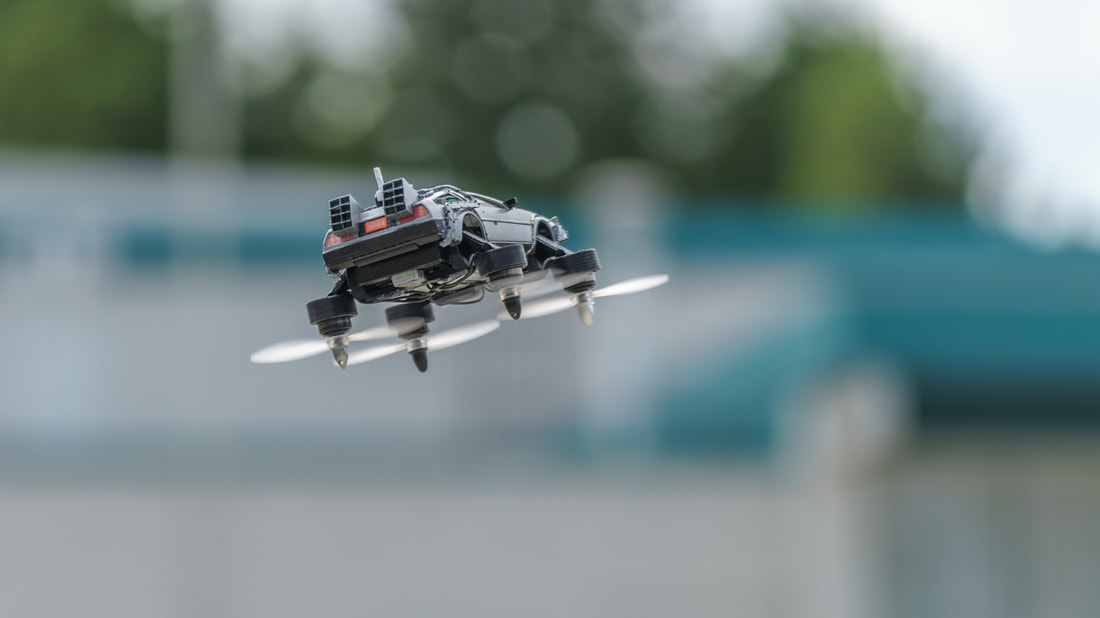
Flying Day
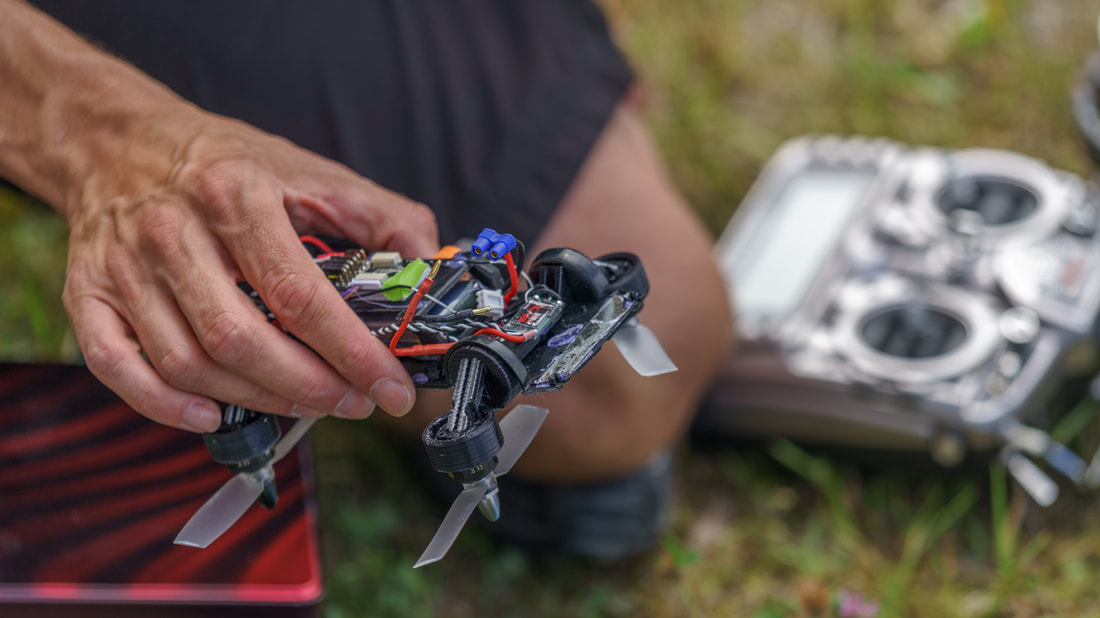
I finally got out in a nice open space to fly the Delorean, unfortunately we had a video camera malfunction so there isn't any lengthy footage worth showing. I do however have these really nice pictures taken by a friend. First a quick flight with the "top off" to get the feel of it.
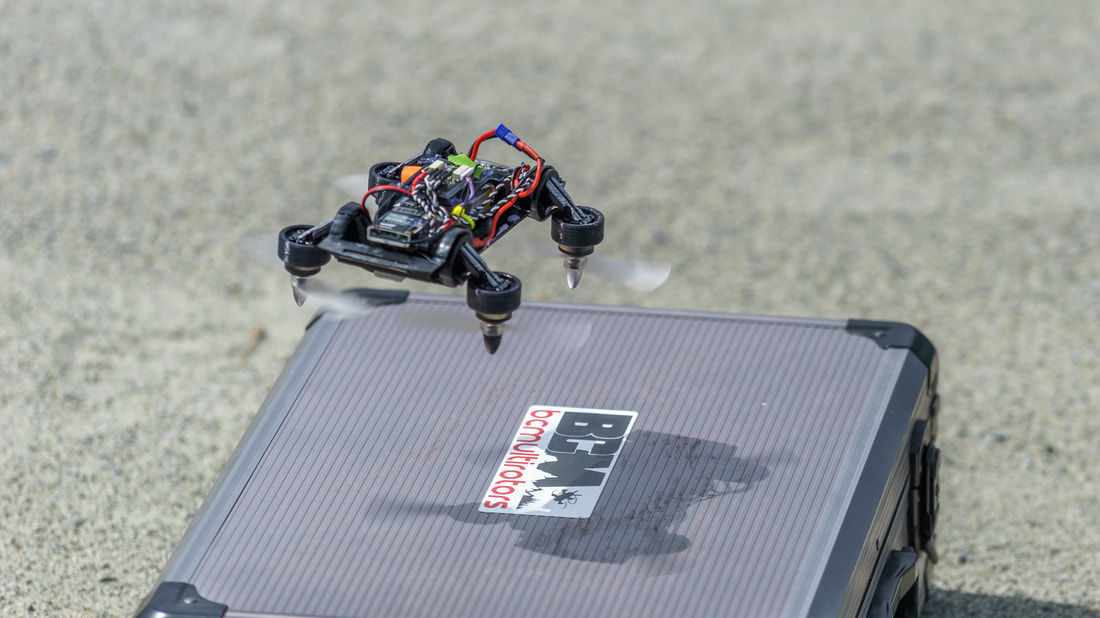

Feels pretty good, well balanced and plenty of power.
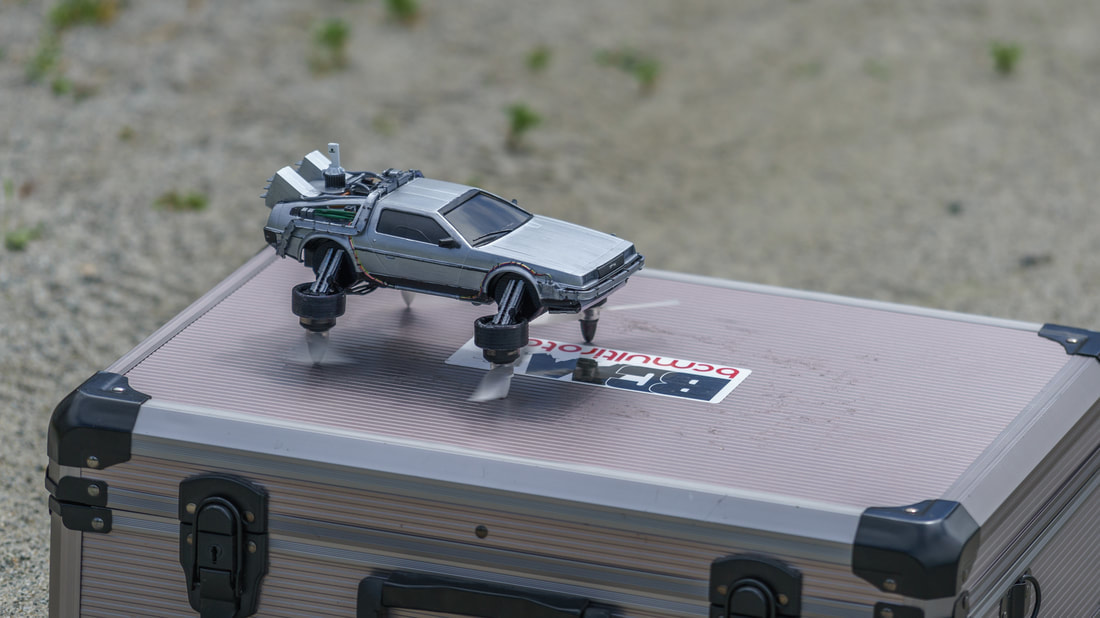
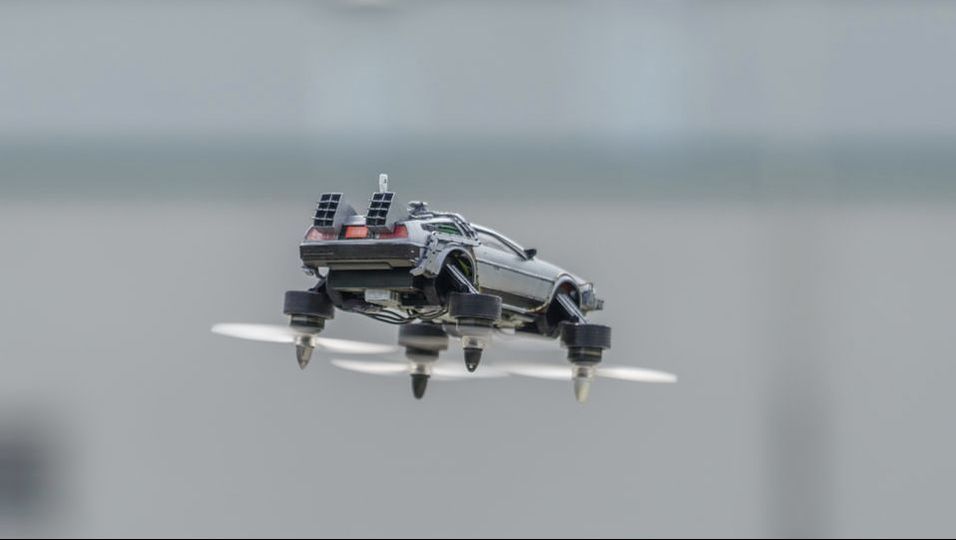
Lets try it with the body on, I can hear the theme in my head as I take flight.
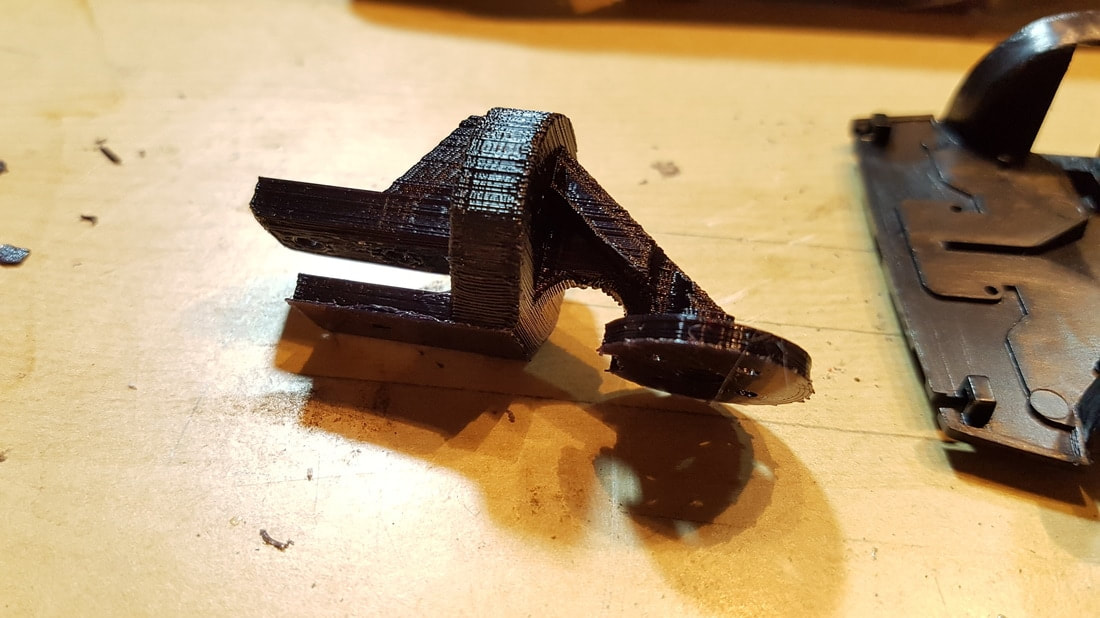
All was going well, until I got a little carried away. I'm going to blame the magnets in the front that were holding the body on, they where interfering with the Flux Capacitor. That or they made the car front heavy.
Whatever the reason, this happened....
Whatever the reason, this happened....
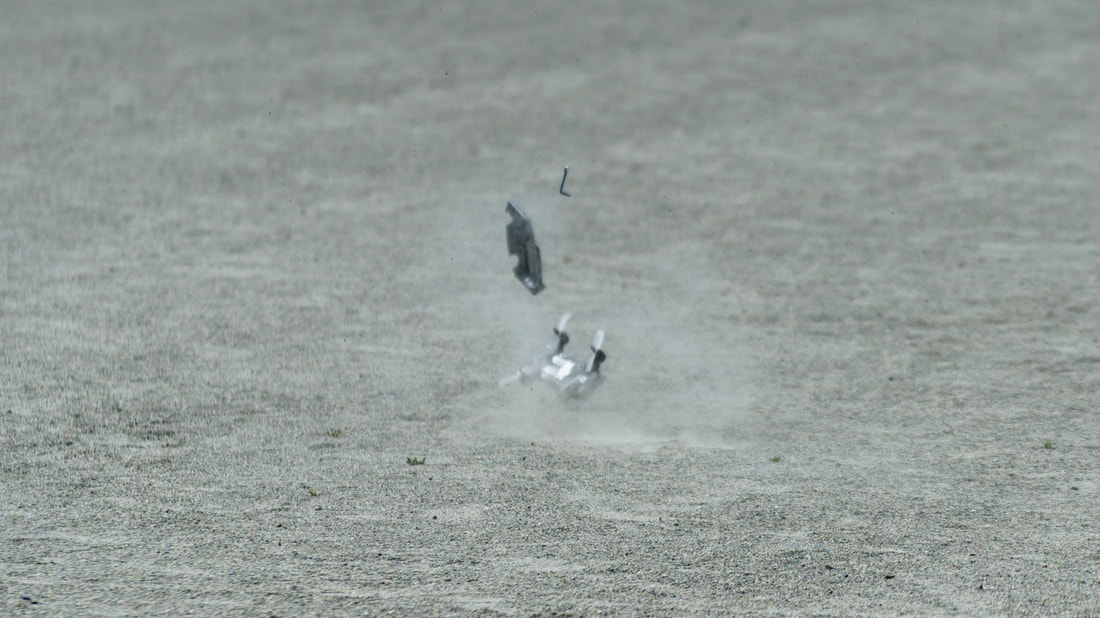


The photos look a lots worse than it really was, she will soon be up in the air again.